Imagine the rich, chocolatey aroma wafting through your kitchen as you bake a soft, moist chocolate cake, perfectly layered with creamy vanilla ice cream. The combination of velvety textures and sweet flavors creates an indulgent treat that’s hard to resist, especially when drizzled with luscious chocolate syrup. Each slice is a delightful surprise, revealing the contrast between the fluffy cake and the smooth ice cream that melts in your mouth.

This homemade ice cream cake isn’t just a dessert; it’s an experience filled with nostalgia and joy. Whether you’re celebrating a special occasion or simply treating yourself on a warm day, this recipe is not only easy to follow but also incredibly rewarding. You’ll want to savor every moment of making it, knowing that each bite will bring smiles to the faces of family and friends alike. Now, let’s dive into the step-by-step process of creating this delicious masterpiece!
Why You'll Love This Recipe
- You’ll adore this homemade ice cream cake for its delightful combination of rich chocolate cake and creamy vanilla ice cream, creating a flavor experience that’s hard to resist.
- The recipe is incredibly easy to follow, making it perfect for both baking novices and seasoned pros.
- Visually, the contrast between the dark cake and fluffy whipped cream topping makes for an impressive dessert centerpiece that will wow your guests.
- Plus, you can customize it with your favorite ice cream flavors or toppings, ensuring it fits any occasion perfectly.
As I presented the homemade ice cream cake, my kids’ eyes lit up with pure joy. Their delighted laughter filled the kitchen as they eagerly dove in, each bite met with satisfied smiles—moments like these make all the effort worthwhile. Now, let’s dive into how to create this delightful treat!
Essential Ingredients
To create a delicious homemade ice cream cake, you’ll need a mix of basic baking staples and some delightful treat essentials.
All-purpose flour: Sifted to ensure lightness in your chocolate cake, which is essential for the perfect texture.
Granulated sugar: This ingredient sweetens the cake while also providing moisture, so don’t skip it!
Unsweetened cocoa powder: Sifted for a smooth consistency; it gives your cake its rich chocolate flavor.
Baking powder: A crucial leavening agent that helps the cake rise and become fluffy.
Baking soda: Works in conjunction with baking powder to ensure your cake has that perfect lift.
Salt: A small amount enhances the flavor of the chocolate and balances sweetness.
Large egg: Ensure it’s at room temperature for best incorporation into the batter, contributing to moisture and structure.
Milk: Use room temperature milk to help blend the ingredients smoothly and create a tender crumb.
Vegetable oil: This keeps your cake moist and tender, avoiding dryness often associated with butter-based recipes.
Vanilla extract: Adds depth of flavor; opt for pure vanilla extract for the best taste experience.
Boiling water: Added to thin out the batter, enhancing chocolate’s flavor while also creating a moist texture.
Vanilla ice cream: Slightly softened at room temperature for easy spreading over the cake layers—choose your favorite brand!
Heavy whipping cream: Chilled before whipping for optimum volume and stability in your delicious topping.
Powdered sugar: Helps stabilize the whipped cream while adding just a touch of sweetness to complement the cake.
Chocolate syrup: A delectable drizzle on top for an extra layer of chocolaty goodness and visual appeal.
The full ingredients list, including measurements, is provided in the recipe card directly below.
Let’s Make It Together
Step 1: Preheat and Prepare:Start by preheating your oven to 350°F (175°C). As it warms up, take a moment to grease and flour two 9-inch round cake pans; you want to ensure that the cakes release easily after baking. The smell of the butter and flour mingling in the air will get you in the mood for baking!
Step 2: Mix the Dry Ingredients:In a large mixing bowl, combine 1 cup of sifted all-purpose flour, 1 cup of granulated sugar, 1/2 cup of sifted unsweetened cocoa powder, 1 tsp of baking powder, 1 tsp of baking soda, and 1/2 tsp of salt. Whisk these together until they are well-integrated. You’ll notice a rich chocolate aroma already starting to waft from the bowl—this is a good sign!
Step 3: Combine Wet Ingredients:Add in 1 large room-temperature egg, 1/2 cup of room-temperature milk, 1/4 cup of vegetable oil, and 1 tsp of vanilla extract. Beat on medium speed for about 2 minutes until the batter becomes smooth and glossy. Take a moment to enjoy the sweet scent filling your kitchen as you blend these ingredients.
Step 4: Add Boiling Water:Carefully stir in 1/2 cup of boiling water into your batter; it will be thin and that’s perfectly okay! This step keeps your cake moist. Pour the thin batter evenly into your prepared cake pans, then pop them into your preheated oven for about 30-35 minutes. You’ll know they’re ready when a toothpick inserted into the center comes out clean.
Step 5: Cool Down:Once baked, remove the cakes from the oven and let them cool in their pans for about 10 minutes. This is a great time to breathe in that freshly baked chocolate scent! After cooling slightly, transfer them onto a wire rack to cool completely—this helps prevent sogginess from steam.
Step 6: Ice Cream Layering:After both layers have cooled completely, carefully remove one layer from its pan and place it on your serving plate. Spread an evenly softened quart of vanilla ice cream over this layer using a spatula—aim for smoothness! Then place the second layer on top. Cover with plastic wrap and freeze for at least two hours to ensure that ice cream firms up nicely.
Now that we’ve got our delicious homemade ice cream cake set up beautifully, let’s finish it off with some delightful whipped cream topping!
Add Your Touch
Feel free to customize your homemade ice cream cake by experimenting with different cake flavors—try a rich red velvet or a light vanilla sponge instead of chocolate. You can also swap out the vanilla ice cream for a fruity flavor like strawberry or mango for a refreshing twist. For added texture, consider folding in crushed cookies or nuts into the ice cream layer. Remember, this is your creation, so be confident in making it uniquely yours!
Now that you’re inspired to personalize your cake, let’s move on to garnishing and presentation ideas that will wow your guests.
Storing & Serving
To maintain the freshness and flavor of your homemade ice cream cake, store it in an airtight container or tightly wrapped with plastic wrap in the freezer for up to one week. When serving, let the cake sit at room temperature for about 10 minutes to soften slightly for easier slicing. Enjoy your delightful dessert with family and friends! Now, let’s explore some creative variations to elevate your ice cream cake experience.
Chef's Helpful Tips
- 1. Ensure Complete Cooling: It’s crucial to let the chocolate cake layers cool completely before adding the ice cream. If the cakes are even slightly warm, they can melt the ice cream, leading to a messy and uneven layer.
- Use Room Temperature Ingredients: For a smoother batter, make sure your egg and milk are at room temperature before mixing. This will help create a well-emulsified cake that bakes evenly and has a better texture.
- Customize Your Ice Cream Layer: Feel free to get creative with your ice cream flavor! You can use chocolate, mint, or any favorite flavor instead of vanilla. Just ensure it’s softened enough to spread easily but not melted too much.
With these tips in hand, you’re ready to dive into assembling your delicious homemade ice cream cake!
As I served this homemade ice cream cake at my daughter’s birthday, her delighted squeals and the joyful chaos of friends digging in reminded me that nothing beats sharing sweet moments together.
How to Know It’s Done Perfectly
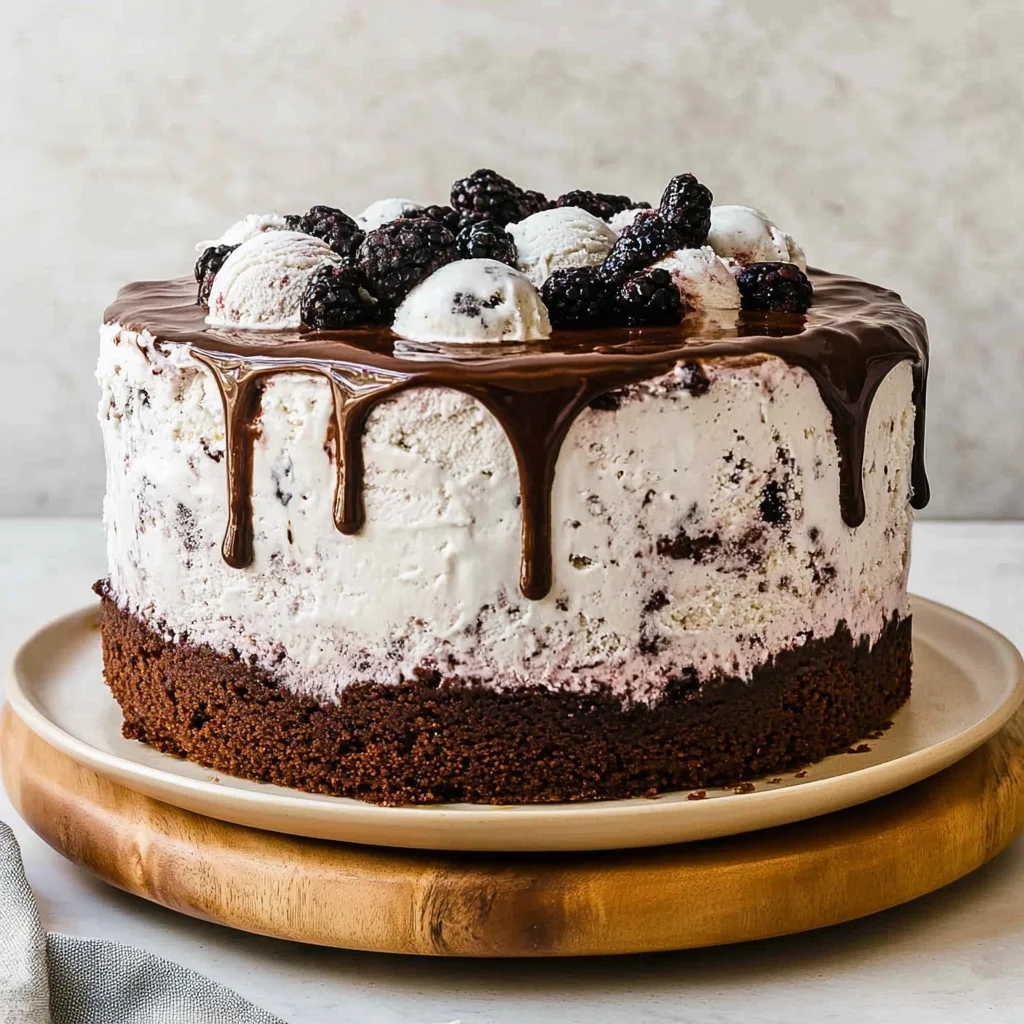
Your homemade ice cream cake should have a rich, moist chocolate cake base that is fluffy yet firm, with the ice cream layer fully set but soft enough to slice smoothly. It should present beautifully, topped with light, billowy whipped cream and drizzled with glossy chocolate syrup. Remember, slight variations are normal, so trust your instincts! Now that you know how to check for perfection, let’s dive into some serving suggestions.
FAQ
Can I customize my homemade ice cream cake with different flavors of ice cream?
Absolutely! You can easily personalize your homemade ice cream cake by using any flavor of ice cream you prefer. Whether it’s chocolate, cookies and cream, or strawberry, the possibilities are endless. Just ensure that the ice cream is softened slightly for easy spreading.
How long can I keep the homemade ice cream cake in the freezer?
Your homemade ice cream cake can be stored in the freezer for up to one week. However, for the best flavor and texture, it’s recommended to enjoy it within 3-5 days after assembling.
What can I use instead of chocolate syrup for decorating my homemade ice cream cake?
If you prefer a different topping, consider using caramel sauce, fruit compote, or even a sprinkle of nuts or crushed cookies to add texture and flavor to your homemade ice cream cake.
Can I make this homemade ice cream cake ahead of time?
Yes! In fact, preparing your homemade ice cream cake in advance is a great idea. You can assemble it a day ahead and freeze it until you’re ready to serve. Just remember to add the whipped cream topping just before serving for optimal freshness.
What do I do if my layers are uneven when making the homemade ice cream cake?
If your layers turn out uneven, don’t worry! You can easily level them with a serrated knife before adding the ice cream layer. Alternatively, once assembled, the whipped cream topping will help mask any imperfections, making your homemade ice cream cake look beautifully delicious.
With these insights into creating your perfect dessert, let’s move on to some expert tips for elevating your presentation.